How-to
Resize an image to exact pixel dimensions
When a form asks for a 400x400 profile picture, or a print shop wants exactly 1200x1800 pixels, guessing is not good enough. This guide shows how to set precise dimensions and control the quality of the result, without sending your file to any server.
Step by step
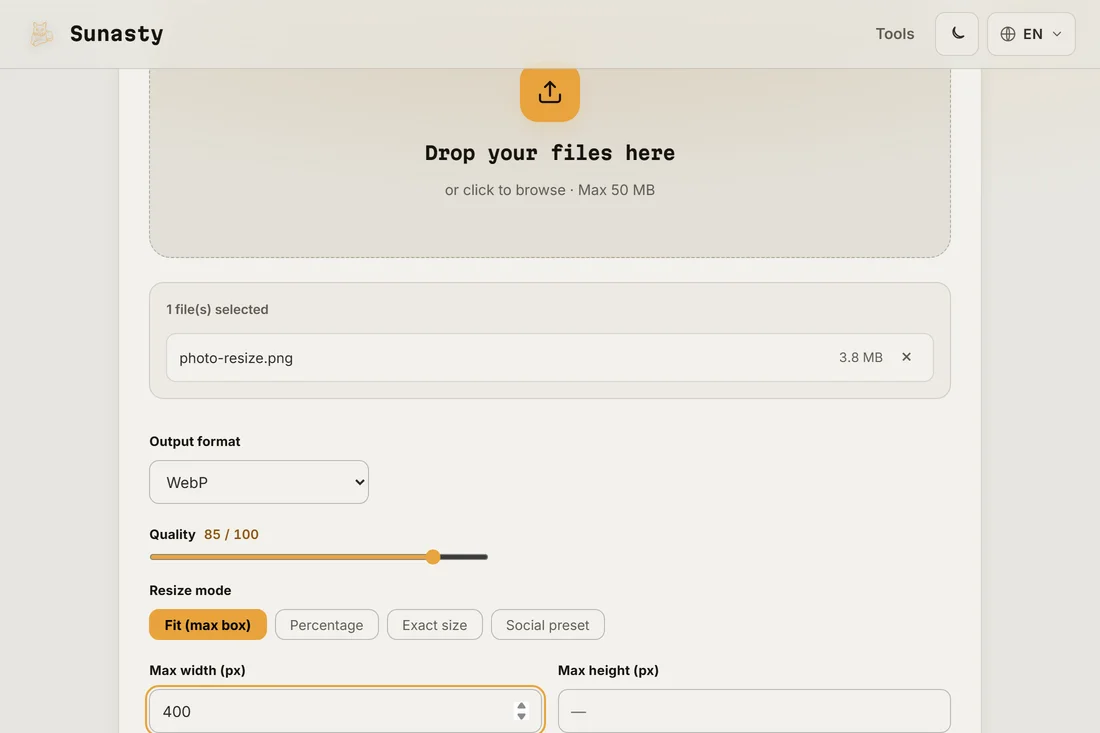
- Open the image resizer and drop your file. The tool shows the original dimensions immediately. If you need a specific ratio - 1:1 for a profile photo, 16:9 for a banner - tick the lock ratio option before entering the target width so the height follows automatically.
- Enter the target width and height. For a profile picture, a common requirement is 400x400 or 1000x1000. For a web banner, typical values are 1200x628 for social sharing or 1920x1080 for a full-width header. If you type only one dimension and leave the lock active, the other adjusts to avoid distortion.
- Download the resized image and verify the pixel count in your file manager or image viewer before uploading it anywhere. The resizer processes everything in your browser: your original file never leaves your device, and the resized copy is ready to save the moment the operation completes.

When to lock the ratio and when to override it
Lock the aspect ratio when you want the image to stay proportional: a portrait photo resized to 800 pixels wide and kept in ratio gives you a taller image without stretching or squashing the subject. Override the ratio only when the target format demands it - a 1:1 profile picture from a landscape photo will crop or distort without a crop step first. The cleanest workflow for forced ratios is to crop to the right shape first (use the image cropper), then resize to the exact pixel count needed.
Keeping quality when you resize down
Downscaling - making an image smaller - almost always looks good. Upscaling - stretching a small image to a larger canvas - introduces softness because the missing pixels have to be invented. If you need to upscale for print, use the highest-quality original you have and accept that the result will look softer than a natively higher-resolution source. The resizer never leaves your device: no upload, no queue, and the result is immediately available to save.
The tools used in this guide
- Resize images Resize and convert your images (JPEG, PNG, WebP) without uploading them.
- Compress images Reduce image file size without uploading. Quality slider or target file size in KB. Batch supported.
- Crop image Crop your images with an interactive preview, drag and resize the crop area. No upload.
Frequently asked questions
Can I resize without losing quality?
Downscaling to a smaller size does not degrade quality in a visible way: you are keeping the best pixels and discarding the surplus. Upscaling is a different story: you are asking the algorithm to invent data that was never there. For web use, resize to the exact display size so the browser never has to scale the image itself, which gives the sharpest result at the lowest file size.
What if the site says my image is the wrong size after I upload it?
The most common cause is that the platform recompresses the upload and applies its own resize, landing on slightly different dimensions. Check what the platform actually needs (its help page usually states the exact pixel count) and set those values before resizing. Some platforms also expect a specific aspect ratio rather than absolute pixels, so check both.